Setting up an API Key
About Element API Keys#
- API Keys authorize usage of the Element451 API at api.451.io.
- API Keys are created by user accounts and serve as an authentication method for that user. All activity completed by the API Key is tied to the user (including the permissions the API key will be able to perform)
- Read more about Security and Authentication. (opens in a new tab)
Best Practices#
- Creating a new internal user (e.g., “Integrations User”) to generate the API key on.
- This prevents loss of API Key access if staff users leave or deactivate their account.
- It also lets you control the permissions associated with the API key based on the permissions said user has. We recommend granting high level permissions to start and then trim them down as you determine the specific functionality needed.
Enabling API Key Access#
- Select your profile icon in the top right, select “Settings” → “Manage Users”.
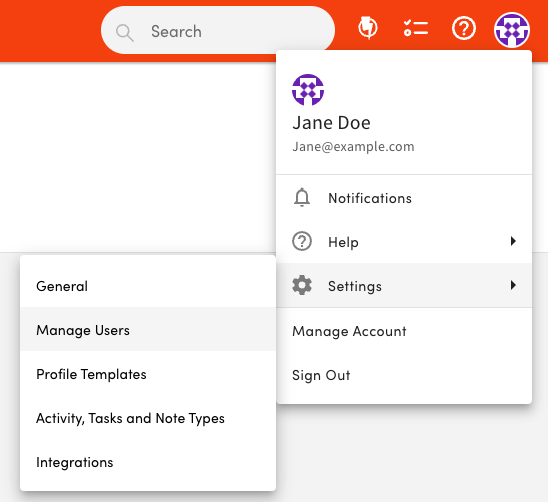
The profile icon at the top right of the Element451 dashboard is clicked, opening a menu for a sample user (Jane Doe, Jane@example.com) with Notifications, Help, Settings, Manage Account and Sign Out. Hovering Settings opens a submenu listing General, Manage Users, Profile Templates, Activity, Tasks and Note Types, and Integrations, with Manage Users highlighted. - Click on “Security” from the left menu.
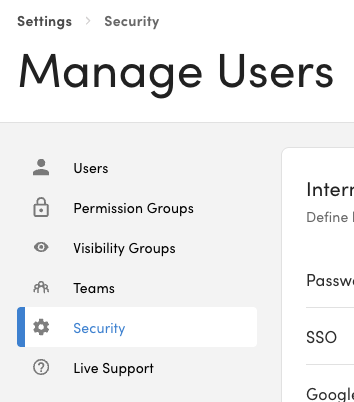
The Manage Users page (breadcrumb Settings > Security) shows a left menu with Users, Permission Groups, Visibility Groups, Teams, Security and Live Support. Security is selected and highlighted in blue. - At the top, toggle “API Key” to enable API Key access to your Element451 instance.
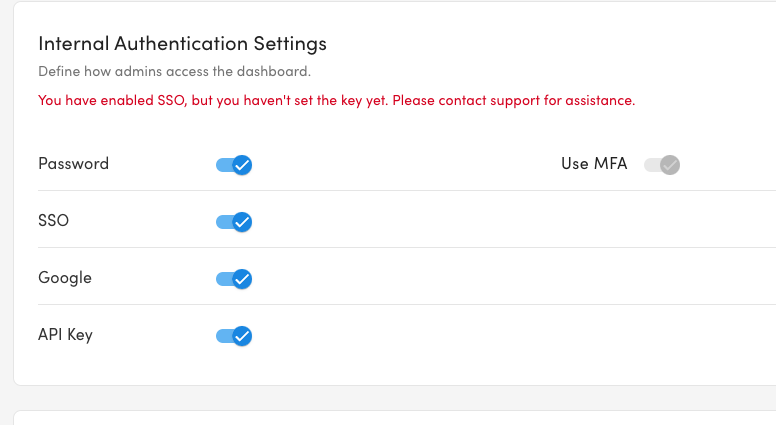
On the Security page, the Internal Authentication Settings panel (Define how admins access the dashboard) lists toggles for Password, SSO, Google and API Key, plus a Use MFA toggle. All four are switched on; the API Key toggle at the bottom is the one this step enables. A red notice reads that SSO is enabled but its key has not been set yet.
Creating API Key(s)#
- Log in as the user you wish to create an API key for (see Best Practices above)
- Select the profile icon in the top right, select “Settings” → “Manage Users”.
- Scroll to the bottom and click “+ Add API Key”
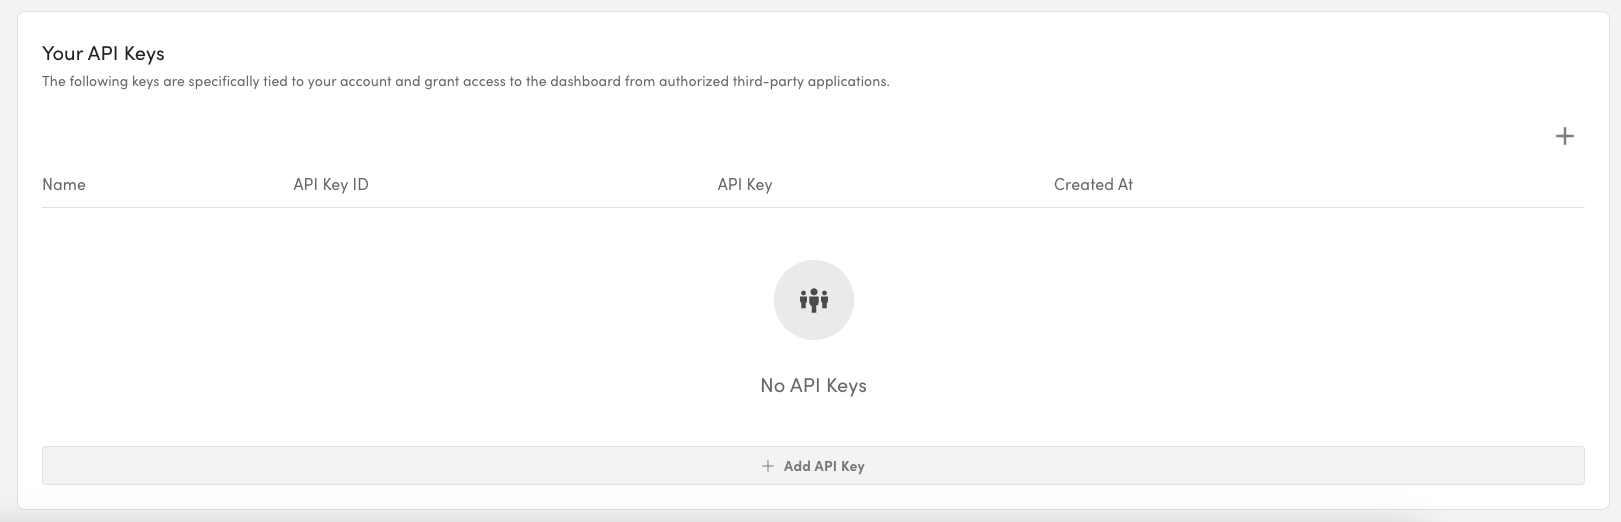
The Your API Keys section at the bottom of Manage Users explains that keys are tied to your account and grant access from authorized third-party applications. The table has columns Name, API Key ID, API Key and Created At, shows No API Keys, and has a full-width + Add API Key button beneath it (a + icon also appears at top right). - In the slide out prompt, enter a name for the key. Click Save in the top right corner.
- A Popup will show the key. ‼️NOTE: THIS IS THE ONLY TIME YOU WILL BE ABLE TO SEE/COPY DOWN THE KEY.
- Copy the key and store it in a safe location.
Finding the Feature and Analytics Tokens#
In order to make an API call, you often have to pass the Feature and/or Analytics token. They control access to certain routes and help with auditing. These tokens can be found in the “Your API Keys” section.
- Log in as the user that has the API key.
- Select the profile icon in the top right, select “Settings” → “Manage Users”.
- Scroll to the bottom to find the API Key under the “Your API Keys” section.
- To the right of the key, click the vertical ellipsis and then select “Example” from the submenu.
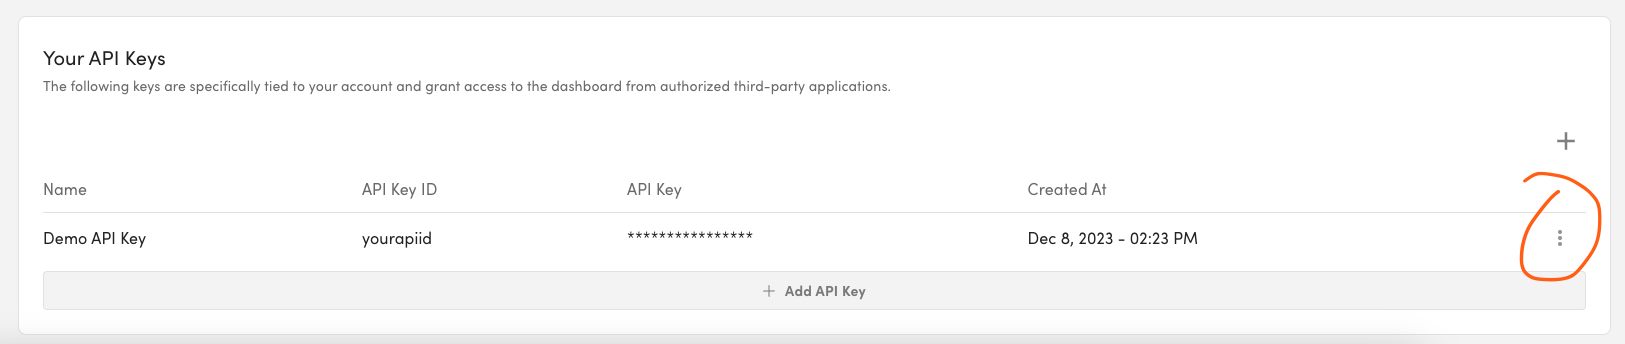
The Your API Keys table lists one key: Name Demo API Key, API Key ID yourapiid, API Key shown as asterisks, created Dec 8, 2023 02:23 PM. An orange circle marks the vertical ellipsis (three-dot) menu at the right end of the row. 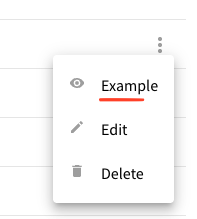
Clicking the vertical ellipsis beside an API key opens a small menu with three options: Example, Edit and Delete. Example, the option to choose for this step, is underlined in red. - Copy the feature and analytics tokens from the query string of the example cURL.
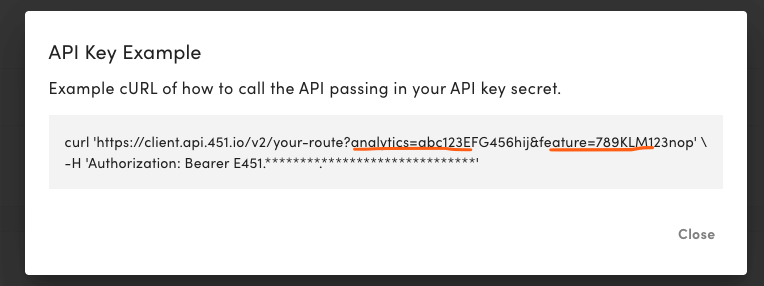
The API Key Example dialog reads Example cURL of how to call the API passing in your API key secret. The command calls https://client.api.451.io/v2/your-route with query parameters analytics=abc123EFG456hij and feature=789KLM123nop, both underlined in orange, and an Authorization: Bearer E451. header whose secret is masked with asterisks. A Close button sits at bottom right.
Removing an API Key#
- Log in as the user that has the API key.
- Select the profile icon in the top right, select “Settings” → “Manage Users”.
- Scroll to the bottom to find the API Key under the “Your API Keys” section.
- To the right of the key, click the vertical ellipsis and then select “Delete” from the submenu.
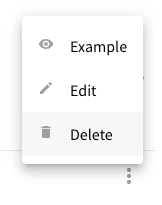
The vertical ellipsis menu beside an API key is open, showing Example, Edit and Delete. Delete, at the bottom with a trash-can icon, is highlighted.
Was this page helpful?